I wonder if this project has been changed in the new version of this course? Since the change to digital photography so much of this project can be carried out in post processing rather than in camera. I have not adjusted any of these photographs but rather have stayed faithful and changed my exposure in camera at time of shooting. The good thing about this project, I guess like all of them is that it makes you ask why you work a certain way. Before now my main aim has always been to get the exposure right at the time of capture. That is to say using the histogram and exposing to the right to capture as much information as possible in the original raw file. I think I will always do this but now I do have the option of under or over exposing at the post processing stage. Anyway here are my photographs and my comments on same;
From what I can see so far, exposure has an effect on; colour, contrast, highlights and shadows.
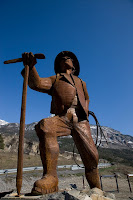
I deliberately under exposed this to change the luminosity of the blue sky.
This is overexposed by 1 stop for no other reason than curiosity. I find if I further over expose it in lightroom it fades the background and places more emphasis on the statue.
Under exposed to change the colours.
The photo on the right is about average, I have under exposed the left hand shot to change the colour of the stone work.
A series of shots changing exposure by half a stop on each one. The first shot is 1 stop under exposed.
1 stop under 1/2 stop under Average by meter 1/2 stop over
1 stop over 1 1/2 over 2 stops over 21/2 stops over.
I think the most acceptable of this series is the averaged one. Having said that, theses are raw files and as such they would need some post processing to make any of them acceptable as they lack contrast. They are very flat.
1 stop under 1/2 stop under Average
1/2 stop over 1 stop over 1 1/2 stops over
Again here I think either the averaged or the 1/2 stop under are the most acceptable.
Again starting from a full step under to a full step over, each one is a half a stop different to its previous. The first two look too dark to me. The third is average and I think either it or the 1/2 stop open are the two best.
Below another sequence starting one full stop over exposed to one full stop darker. My preference would be for the 1/2 stop under I think the light is softer.
one full stop darker. Too dark, no shadow detail.
1/2 stop under. Still no shadow detail although the highlights are o.k.
This is taken at the average on the meter. Good shadow detail, look at the markings on the cats coat. I think this is probably the best shot so far.
I think the highlights are blown out here.
Definitely over exposed here.
a full stop under exposed. Too much shadow.
A half stop under exposed. Still shadowy, but I notice that the water droplets show up well in this and the last shot.
Average exposure. Now the shadows are fine, the details are good in these area but the sky is overexposed, could use a ND grad. This is probably the best of the series.
Half a stop over exposed.
a full stop over exposed.
 0.6 nd grad used.
 0.3 nd grad used.
 no grad used.


